Have you ever been scrolling through your Pinterest feed and noticed that some pins have extra info at the bottom of them? These are called rich pins and most often they include some added info (favicons, website name, titles) that make them more likely to catch the pinner’s eye in a feed full of pretty pictures.

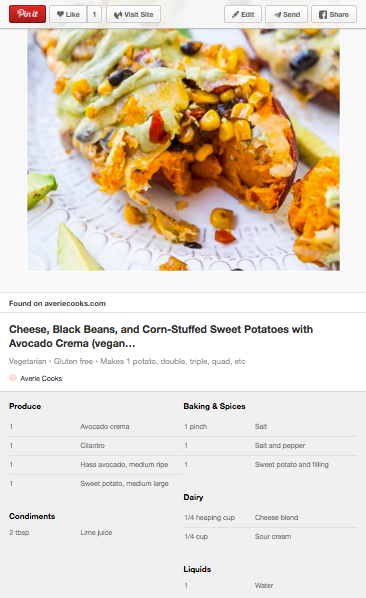
In some ways, they make your pins look more . . . legit. Also, there is some extra info included when you’re using rich pins. For example, this recipe post that gives the ingredients list. Pinners have to click over for the directions, but they get a better idea of what they’re getting into this way.
So now that you’ve seen the difference, you might be wondering how one gets rich pins? The good news is that there isn’t a secret society you have to join. A few simple tweaks to your blog and a nice note to Pinterest is really all that it takes.
The first step is making sure your blog has all the right meta data in all the right places. You have to make this really easy on Pinterest. There are some easy ways to do this and some hard ways. I’m not gonna get into the hard ways because who wants hard?
If you’re using the WordPress SEO Plugin by Yoast, then you are probably all set to move on to the next step. Among its many fabulous features, Yoast organizes your meta data in a way that other websites can find and understand it.
Another easy way to get your data in order is through WordPress Jetpack. If you aren’t already connected to Jetpack, you should be. There are tons of great features you can access through that one plugin. In this case, you want to enable the one called “Site Verification”.
Once this is done, hop over to the (which is way less scary than it sounds). Plug any POST url in there and click the validate button.

Pinterest will do its thing for a minute – don’t stress! If it gets hung up, feel free to refresh. Once it’s done you SHOULD get this screen. Otherwise, you can for help but I’m really hoping you don’t need to.

At this point, you have the opportunity to preview what will be included in your rich pins. Since this info is pulled from your meta data, it will update automatically as you change it (sometimes there’s a little lag time). Just take note of the info that needs adjusting and then hit that “Apply Now” button. Since the acceptance process can take a while, you want to get it going ASAP.
Quick note: If you are seeing the Genesis “G” icon in the favicon spot, see this Blog Talk post for how to fix that.

Once you’ve been approved, you should get a nice email from Pinterest telling you so. Or one day you’ll just notice your pins have a new look. If neither happens and it’s been a while (like weeks, not days), you can try to either reapply or contact the Pinterest people.
